Monday, December 25, 2017

Merry Christmas, Backer Board and Sanding!

Merry Christmas to everyone. No boat building today, but while I am waiting for my son to arrive, I thought I would post. The Holidays have been busy and I have had limited time to work, but I still manage to do a task here and there.

A couple weekends ago, I bought a piece of Oak from Home Depot. I wanted to cut a piece to act as a backer board to support the removable tabernacle. From viewing the forum, John Harris recommends a 10" by 13" backer board. It took me a while to cut out using the bandsaw. I then had to setup the router table again to cut the 1/4 inch round-over. I then sanded smooth and have already put a coat of epoxy on it. I am trying to determine how I am going to mount it. Whether to permanently or just bolt on?


Backer board for removable tabernacle.


Last weekend we had a nice day in the upper 60's, so I pushed the boat out into the driveway and started to sand and sand and yes more sanding. I actually had a couple of session earlier in the garage. I was getting the boat read for fiberglassing. 


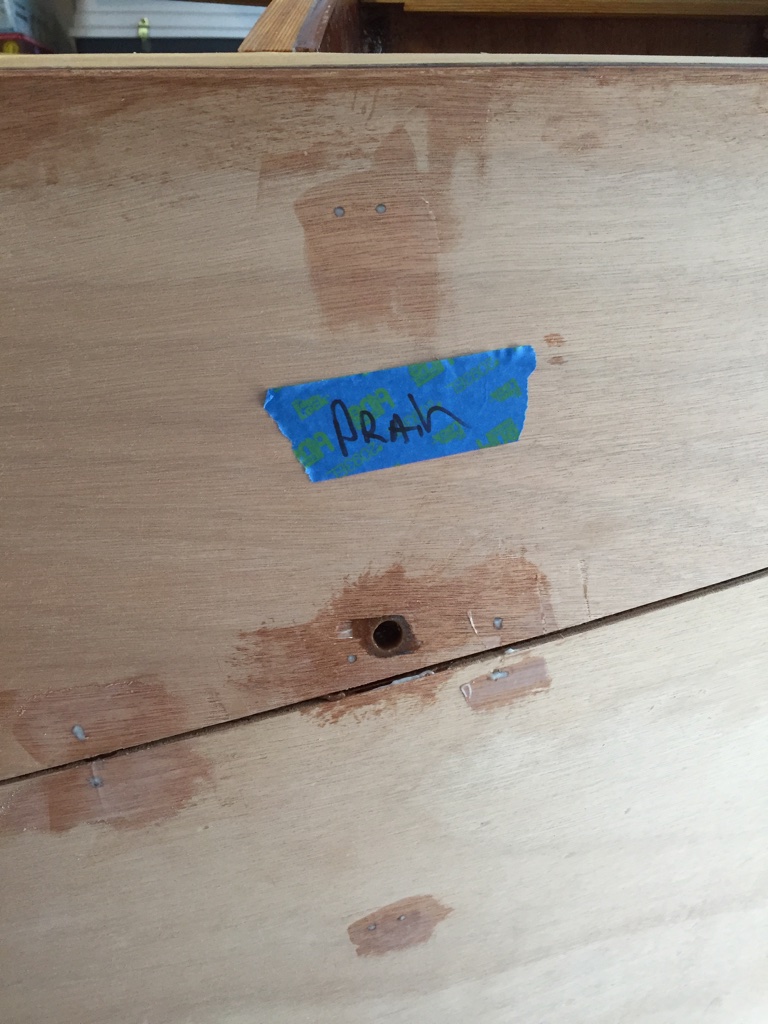
I also spent some time filling in all the holes and gaps. This took a couple of attempts. The lighting in the garage is ok, but working mostly after work it is hard to see. Having the boat out in the sunlight I was able to see everything very well.

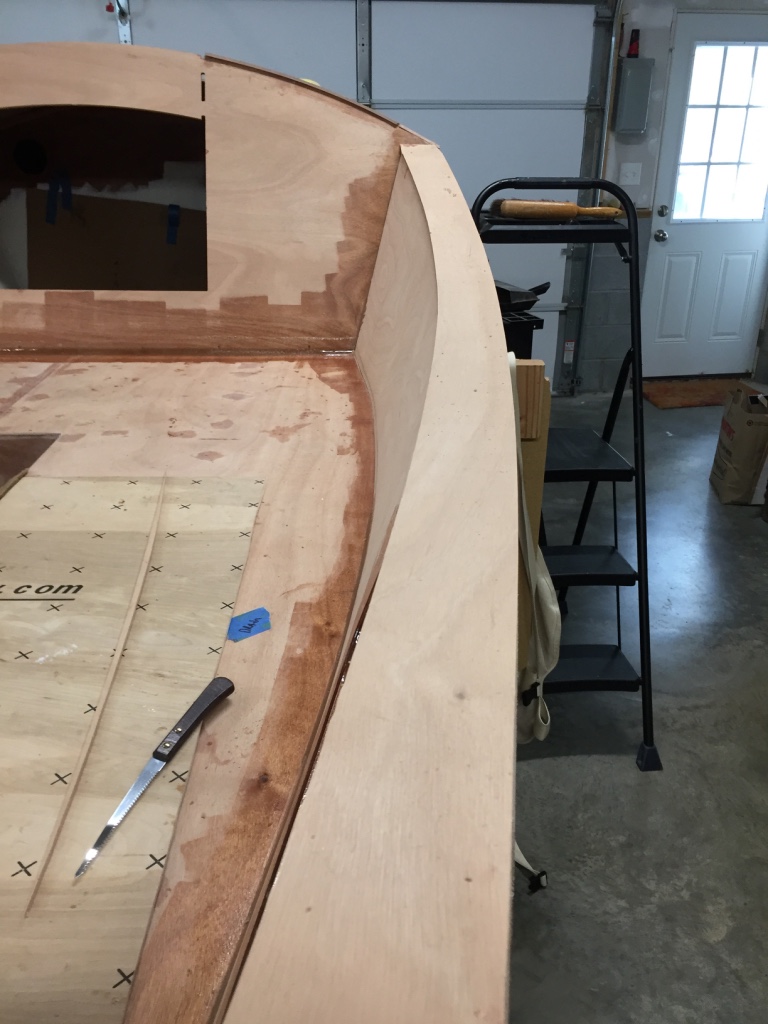
The boat ready for glassing. Notice my cradle setup with furniture dollies. It makes it easy to move the boat in and out of the garage. 


I also spent some time on the transom skirt.  I had to use a plane and a bunch of sanding to get the shape to look right. I am pleased with the way it turned out.


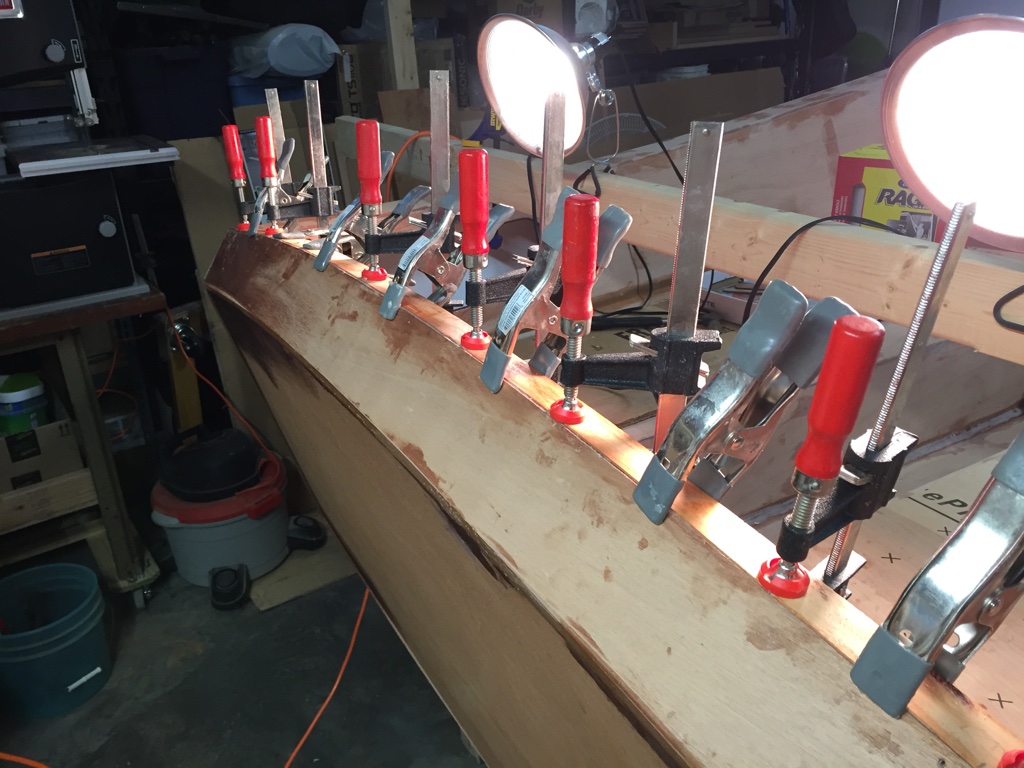
After a bunch of filling holes and sanding, I was ready to start fiberglassing. With the temperatures still very cold, I have to use the work lights to help with curing the epoxy. Below you can see the port side cabin deck where I installed fiberglass and did the first filler coat. The top horizontal part was easy. It was a little bit of a challenge to do the vertical parts.  I finally wound up using a brush to get the epoxy on the glass and then a a brush and roller to get it spread out. I think I will do some research on methods to applying epoxy to vertical pieces before attempting any more. 


Saturday, December 9, 2017

Transom Trim and Winter is here!

With Thanksgiving Holiday and work, I have been limited with working on the boat, but I have been continuing to move ahead. Over the last couple weeks, I have been focusing on the transom and filling the many holes with epoxy.

Last weekend I cut the trim for the transom and that took a few hours to set things up, make some test cuts and then cutting the actual pieces. The piece on the left goes on first and then the one on the right.


Below is where I did a dry fit of the first piece of trim, so it would become accustom to the curve. One thing I have learned is that when you are trying to do some type of bend and you are applying epoxy, the part will want to move or slip all over the place. I am not sure you can see it, but I decided to use some screws to hold it place.


I left the piece for the week and finally got time yesterday and today to start installing them. I installed the first piece of trim yesterday and things went pretty good. I used the screws and then a bunch of clamps to hold it in place. Nature decided to bring a nice winter storm late yesterday and today, so the temperatures dropped and we got a few inches of snow. I had bought these work lights and setup a 2X4 to hold the lamps so it would help the epoxy cure over night.

Winter has arrived! 

First piece of trim.


Work lights setup to help the epoxy cure.


This is the first piece of trim cured enough to install the 2nd piece. 

I installed the 2nd piece today and used the lights to help if cure. It went on ok, except for the end of the wood. I just put a screw into it. I tried the same thing on the other side, but split the wood. I still had enough epoxy in the cup to fix that! :-)


Some other work I did was to start filling all the cracks and holes from building the boat. I mixed up a couple small batches of epoxy and applied it with a putty knife.  You can see all the dark spots below. 


With Winter here, I am going to probably work on some bench projects. Unless I can get some warmer days, I am not sure I will be able to apply large areas of fiberglass. I may try to build some special brackets to hold the work lights. 

Monday, November 27, 2017

Sanding and Getting ready for Topside Fiberglassing

Over the pasts couple weeks, I have been cleaning up the edges on the seat back and roofing decks.
I used a router to cut off some of the edges, but was not happy with it. As you know you can make quick mistakes with power tools, so I started to use my hand tools. I did make one mistake, but I was able to stop before it did too much damage. I may need to build it up a little with some fairing compound I bought.  Using hand tools is slower and I spent a few more hours here and there working on things, but you have all the control.

My tools of preference were the Japanese saw, rasp, block plane and orbital sander.  You still need to be careful, but you won't do too much damage. Below is picture of me cutting off the extra edges.


For the most part, I have a rough edge all the way around the seatback decks and the roof decks. After using the saw, rasp and plane, I used the orbital sander with 60 grit. I plan on using a hand sanding block with 120 for the final touch ups and rounding over the edges. 

Below are some pictures. 

Notice I cut out the support, so I can actually walk into the cabin. I will have to admit. I sat in there and drank a beer admiring the boat. Actually it was more like noticing more things I need to touch up! :-) 


I also did the fillets in the deck area. I think I have them down now somewhat.  Too bad, I am almost finished with fillets though! Maybe on the next boat! 

You can see where I painted the lockers before installing the setbacks.


Next up is to finish all the sanding this week in preparation for laying out fiberglass. It is starting to get cold, so I hope I can get this done. I can keep the garage at about 60 degrees, so I should be ok for another month until January when it gets really cold.

I also need to do the trim on the transom. I didn't think I had the lumber, but I found it last night.

Monday, November 13, 2017

Roof Trimming and Seat Back Decks


I removed the screws that were temporarily holding the roof deck down while it cured. I then took my router with a flush cut bit and started to trim off the the excess. A word of caution is that you can't rely on the ball bearing to guide 100%  where it is cutting. The whole roof is attached at angles, so you have to keep an eye out on where you are cutting! The ball bearing is for flat surfaces. I accidentally took a little too much off of one of the dorade boxes. I will have to take a close look at it, but I think I may need to build it up with some faring compound before I start to lay fiberglass. I also may need to buy a grinder to make the edges of the roof deck flush. I have yet to attempt to use a sander to see how that works on sanding the edges.

Below are few pictures of the decking on and first cut at trimming. Still lots of work do be done.


I also managed to get the seat back decking on as well and trimmed with the router. I still need to do the fine sanding to clean everything up.  I used stainless steal nails with my nail gone and that worked very well.


I used the weights to hold down the decking in areas that I didn't want to use the nail gun. The 3/4 " nails would poke through a little and I didn't want them sticking me in the locker. In the other areas the board didn't want to sit down 100%, so the extra weight held things down properly.


Below are pictures of the finished product and after trimming with a router. I still need to sand the edges up.


Monday, November 6, 2017

The Roof is On!!

Well my plans didn't go 100%, but I was able to get the roof on this weekend. I planned to do the seatback tops as well, but when I put the roof on I couldn't get the boards underneath. Not a big deal. I will try and do one night after work this week.

Putting the roof on was a pretty big task and I did it solo. I mixed up a Large batch of thickened epoxy and laid it out using a pastry bag. I then took a brush and spread it out evenly. I then climbed inside the boat and had the roof laying in the cockpit area. I was able to lift it up and laid it down almost perfectly. I used a couple of spring clamps to hold it in place and then drilled and screwed in some screws (with small blocks) to hold it down. Having pre-staged all the needed tools, things went pretty well. Meaning, I didn't have to climb in and out of the boat. It took me a while to hold down the top, drill and then screw things down. I worked up a good little sweat and it was only in the 60's. I could have used some help to hold it down while screwing.

Below are pictures of the completed roof.


I will let the epoxy cure for a few days before removing the screws. I will then use a router and bit to cut off the edges flush. I will have to say it was a nice moment to be able to sit inside and see what the cabin will feel like!!! :-)

This post is a little out of order. Prior to doing the roof, I had to finish up some things. First was to sand the underside of the roof where I had applied multiple coats of epoxy.  I moved outside the previous weekend and sanded things.


One thing you don't want to forget is to drill the drain holes for the dorade boxes. You could do these afterwards, but you can definitely see and access things better. I used the drill-fill-drill again approach on the outside dorade box drains. On the inside dorade drains, I decided to drill a small pilot hole and then used my Dremel tool to expand it to the size I wanted. I then put a couple of coats of epoxy in there to cover any exposed wood. I will probably do more of that when I start the fiberglassing.

Below are a couple pictures.
Used drill-fill-drill method here.

Used a Dremel tool to expand a pilot hole drilled first. 


Next up will be to trim the edges of the roof and finish up the seat back top and fillets in that area.

Monday, October 23, 2017

Installing Seatbacks!

Well I still seem to be working all the time at my day job and going out of town on trips, so the boat building time has taken a hit. I did get some time this past week and weekend to install the seatbacks.

I had a brad gun that I have never used and bought as a kit many years back. I decided to order some stainless steal brads and use them to hold the seatbacks in place.  I looked at the local big box stores, but they didn't seem to carry any stainless steal brads. There are probably other places you can get them, but I purchased them from Danow Fastening. I bought 2 sizes, but wound up using the 3/4" inch. I would shoot them in at an angle, since they will go through both the seatbacks and framing. This is only an issue in the locker area. You don't want them going through and cutting your hand at a later date. I was very happy with the results and it was a heck of a lot easier than using temporary screws. The brads will be left in.


There have been a lot of little projects before installing the seatbacks that I have done in previous posts (gallows pole base and painting), but I was finally ready to install. I mixed up a big pastry bag of thickened epoxy and spread it out on all the seatback framing. I then installed the seatbacks and used temporary clamps to hold it in place. It took no longer than a minute to shoot a bunch of brads into them to hold down.

Below are a few pictures.


Also note the hole already drilled, coated in epoxy for the gallows pole. I can install the cap and cut out with a router at a later date.


If you look closely at the picture below you will see a little round hole in the bottom next to the transom. This is where I pre-drilled a drain hole for water to drain from the locker. I left the framing short, so it is a natural place for water to drain through.  Thanks to Jeff "Old Soul" for another one of his ideas! 


Next up will be installing the roof deck. I have already finished planning the cleats and will do a quick check this week before installing the deck. I also need to drill the drain holes in the dorade boxes and cut the holes in bulkhead 2 that go into the dorade boxes. I bought inspection plates last week. 


Monday, October 9, 2017

Roof Cleat work, Dorade Boxes and Gallows Pole


Roof Cleats and Dorade Boxes

I finished epoxying all the roof cleats and have started to use a block plane to get the angles correct to install the roof. I don't have any pictures to show, but I am about 1/2 of the way done. I have been using a hand plane and it is taking some time to do. I plan on using a sander to do the final shaping. 

Below is where I was glueing the blocking to the inside of the Dorade boxes. This will provide something to attach the mooring cleats to at the end of the build. I still need to get a hole saw to cut the hole through bulkhead 2. 

 
Dorade Box Mooring Cleat blocking

In between working on other tasks, I applied 3 coats of epoxy to the underside of the roof. I am thinking if I want this natural or whether to paint it. I still have a little time to decide.


Gallows Pole

I have been thinking a lot about the pole installation for the boom gallows. I purchased the hardware kit from CLC and was concerned about the poles lining up to the flanges that are installed inside the lockers on the seat backs. I figured it would easier to do any work in the locker without the seat backs installed. In my case I was right.  I made a temporary boom out of a 2X4 using the pattern provided.
I then held it up and determined where I should drill the holes for the poles on the blocking I installed.  Per the manual you need to cut off one edge of the flange (see below), so that it will fit properly in the locker.  To do this I tried a cutoff tool on my Dremel tool, but that didn't work very good. I decided to use a hack saw, which was a lot of work, but I got the job done. To hold them I bolted the flanges to a scrap piece of wood, so I had something to clamp down.


Flange bolted to scrap wood. 

End result with edge of flange cut off. 

 I next installed the boom with poles through the new holes that I had drilled in the seat back. Unfortunately, even with the edge cut off of the flange, they did not line up properly. They were not straight vertical. I then decided to cut a small piece of blocking to raise the flange and that did the trick. I then had to sand through the finished painting I had done and then I epoxied the blocks in place. I have already applied multiple coats of epoxy and 2 coats of primer as well as applied epoxy to the inside of the hole I drilled. Once I epoxy the seat back tops, I will just drill a hole from underneath and use a route to expand the 1" hole in the top.


Doing a test fit of the gallows. 

Blocking to raise the flange.  

Hole drilled and flange painted. 
 I will put a couple coats of Brightside top coat on the blocking and then I should be ready to install the seat backs.


Monday, September 25, 2017

More Dorade work, Roof Cleats and Painting

Roof Deck Cleats

This past week after work, I managed to get all the roof deck cleats epoxied to the bulkheads. I made sure I cleaned up any epoxy drips a couple of times. I think they turned out fine. This week I plan to start with the block plane shaping them for the roof deck, which I also glued together with a butt joint.

Roof Cleats epoxied and curing. 


Dorade Boxes
Below are the Dorade Boxes with the roof cleats. I still need to add the blocking on the inside for the mooring cleats that will be installed later on the outside.

Dorade Box cleats epoxied and curing.  


Below may be difficult to see, but I applied some fiberglass tape on the insides of the dorade boxes at the joints as well as a piece of tape on the outside corner. I still need to apply another coat of epoxy to completely wet it out.


Roof Deck Panels
Below is where I epoxied the 2 roof panels together. You use a butt joint, which is basically a piece of 1/4 inch plywood 2 1/2 inches wide. I used some weights to hold it down. 


Painting Lockers
Over the weekend, I was able to apply 2 coats of Interlux Brightside paint to the locker space. I figured it will be easier to paint before installing the seatbacks. I am also considering drilling the holes for the Gallows bars and installing the supports in the lockers. I got the pattern out and I am working on a temporary piece, so I can drill the holes in the correct space.  Below is a picture of the finished painting. I also plan on doing the drain hole for the locker. From looking at other blogs, I can put a hole in the bottom right hand corner next to the transom. I just need to figure out how to do that.