Sunday, October 14, 2018

Finally Some Hull Paint!


Lots of Prep Work! 
When I installed the dynel clothe, I mentioned that I didn't know if I would be able to fair it in properly. I tried multiple coats of epoxy and sanding, but it still didn't look good to me. I finally decided to apply another layer of fiberglass over the clothe.  This seemed to do the trick. 

Below is a picture of the fiberglass over the dynel clothe and that seem to do the trick. The fairing compound is applied in a couple places that I noticed were low by rubbing my hand over the hull.


Another picture where I added more fairing compound to fill a couple of non-smooth areas. 


To get the boat level, I had to create another bench to be able to support the height. Since I have the boat on furniture dollies and tires, the height to get it level was pretty high. I had to use a farm jack that I purchased from Harbor Freight. This allowed me to get the height.


The below picture shows the bench with some wooden blocks to level it out.


I used the procedure in the manual to draw the lines out. I purchased a laser level from Home Depot for about $79.00. I have been wanting one and to rent one for a day was close to the cost. I attached it to a camera tri-pod I had and it seemed to work pretty good.  I used a pencil to mark the lines from the laser and then used a straight ruler to draw everything out.  I then used some 3M 2080# tape to mark everything out. 

So finally some Paint! 
I decided to use Interlux 33 per the manual and I rolled on a couple of coats over 2 days.
The stuff is pretty thick and I tried to do the roll and tip method, but the tip part seemed to just cause more marks. I didn't thin the paint any and in hindsight, I probably should have. I think it turned out pretty good. I can see some roller marks, but that is probably just me trying to review too closely. I used a small roller, but on the second coat, the roller pretty much tore apart. I looked at the package after it happened and the package said for latex paint. Not sure if it is for Interlux 33 type paint. Before I apply any more using the roller, I am going to purchase some smaller rollers that will support this type of paint.

Below are a few pictures of 2 coats.


Since the paint roller decided to break apart while applying the paint, it left a couple of areas/marks. I plan on doing a light sanding and probably applying another coat. 

As for the 3M 2080 tape, it worked great. The line is sharpe!!!!

Next up will be to apply the side panel paint. I have chosen dark blue, just like PocketShip #1.  So the plan is 2 coats of primer, sanded and then 2 ?? coats of Interlux Brightside.

Saturday, September 22, 2018

Still working on the hull!

Sorry for delays in posting. I went on vacation again to Beaufort NC (had fun!), so time away from building! Work has also been taking a lot of my time, but pays the bills, so I can't complain too much. If only I could work on the boat everyday!

Dynel Clothe
I did get all the fiberglass patches on and put dynel clothe on the keel and bow area. Not sure this was a good idea. The dynel clothe will definitely protect the hull, but I am going to have a time fairing it in. The dynel is also a different texture and will feel like canvas to the touch. The stuff was also next to impossible to cut with scissors. I wound up using a straight edge and using a utility knife. That worked fine. I also think it is going to be noticeable through the paint, but once in the water, no one will see.


Dynel Cutout and ready for epoxy. 


Dynel wetted out with epoxy.

Below is a picture of some fairing compound I applied to fill in the bumps along the joint. I will be sanding that down to make is smooth. This was the only area I noticed, but I will do another once over.


Last weekend I spent 4 hours sanding the hull and it is about 95% done.  One more session and it will be ready to paint. For the dynel area, I am thinking of either putting more coats of epoxy or fiberglass over the bow area to help fair it out. I decided to put another layer of fiberglass over it yesterday. Below are the pictures of this. I will put the normal 3 coats on and see how that comes out.


Layer of fiberglass over the dynel . 

Yesterday I also applied a fillet along the whole under edge of the rub rail. I noticed some spaces between the hull and rub rail. I don't water getting up in there. Not sure why this occurred, since I had plenty of epoxy squeeze out. I still need to sand the rub rails for finishing.

Small fillet between hull and rub rails. I used a pastry bag to apply. 

The rest of the hull needs another once over for sanding. I am going out today to look at a laser level and just ordered some tape to tape off for paining. I also got some more paint supplies, so slowly getting there.

Friday, August 31, 2018

Fiberglass woes!

I had some problems with fiberglassing the hull. Nothing that I couldn’t fix, but just taking longer.

To start, the roll of fiberglass I have has what I call a run in the roll. I have been able to work with it up until now, but it caused me some pain with a bubble along the entire port side of the hull. I ended up sanding it down and putting a patch on the entire length of the boat.

I also had a lot wrinkles all over. I took my time as I have done previously, but again I had bubbles that needed to be sanded down and patched. I thing I wound up with about 10 places, so I had to do a lot of rework. One good thing, I will have plenty of coats of epoxy on the hull.

It has been very warm in the garage. About 80 degrees during most of my working sessions. I wonder if that had anything to do with it, but at this point it is water under the boat! ha ha!

If you look closely you can see my pencil marks where I needed to patch and the fiberglass patches

I also have been putting extra fiberglass on the bow. I already have 3 and may do more before laying down a layer of dynel clothe I purchased. I need to see how thick it is. It is still in the packing.


Now I get to re-sand the hull. Shouldn’t take that long, since it is pretty smooth.
I also have some places I will need to use some fairing compound on. The finger joint in the above picture has some dips that I can see.


Sunday, August 12, 2018

Progress on Fiberglassing the Hull

I have been working a lot lately including some weekends, so I decided to take a comp day this past Friday to have a 3 day weekend. With this time I was able to finish up the sanding and make a big dent in the hull fiberglassing.  I went back over the entire hull with 120 grit and wiped doing everything. Prior to that this past week, I refilled some of the spots that didn't cure properly and refilled some holes.

Friday I started with one side of the bottom. This takes a full 50' wide piece of fiberglass. The first side I poured epoxy on and spread it with a plastic spreader. I then switched to the roller method, which I thinks works better. I used the roller method on the remaining portions.

Below are a couple of shots before I wetted things out.  This first side took me about 1.5 to 2 hours to mix up a lot of epoxy and spread out.


Saturday I did the other side. Below is the other side of the bottom with the fiberglass laid out before wetting out. I also did coat # 2 on the previous side.


It has been in the lower 90's, so I can take only so much working in the garage in 80 degree temperatures. I got up early this morning and laid out the fiberglass on both the upper side panels. I used blue tape in a couple of areas to hold the fiberglass in place until I could get it wetted out.

Below are both sides before wetting things out.


Here is a picture of the entire boat wetted out, minus the transom. I plan on doing that hopefully this week, maybe as early as tomorrow night after work.


Wednesday, August 1, 2018

Filling Holes and Sanding!

I went out of town last week for 4 days, so that limited time to work on the boat. But as I have said before, taking the wife to a Bed and Breakfast makes any mess in the garage I make much easier for her to take. I have fun too.

Filling Holes
After I got the hull turned over, I started to work on sanding the rub rails. When I first installed them, I didn't do any of the tapers or angles. I just glued each piece on and decided to use a belt sander to level out when I flipped it. This was a little bit of work. I had some 80 grit, but it was taking a lot of work, so I went to the store and bought 30 and 60 grit. That did the trick! Be careful!

Below are pictures of port and starboard rails. After flipping, I discovered a couple things that I will need to address.
1) I think I will put a very small fillet between at the edge of the hull where the 1st piece was epoxied on. There are a couple places that I see space where water can get in.
2) I also noticed a couple places between the pieces that didn't get filled with epoxy. I am very surprised with this. I put a lot of epoxy on each piece and it pressed out.

Nothing that can't be fixed.

Rub rail


Next up I decided to fill all the holes and the edge you can see above between the bottom and side panels. I know this is supposed to be a round over, but I have a gap that I think needs to filled. I will also round it over as well.

Below you can see where I have filled all the holes.


Filling the edge between the lower and upper panel. 

Also did a large fillet along the keel.


I did all of these in one session and let them cure for a couple of days. As I was packing up to leave, I was walking around and noticed that some of the epoxy was not curing. It was soft and it had been 4-5 days. I used the pre-mixed epoxy in a tube I got from Jamestown Distributors. The only thing I can think of is that I rushed and didn't properly push out a little epoxy before using it. That allows for it to properly mix. I used a couple of tubes and recall just putting the cap on and applying it. My fault!

Below is a section that was not curing. I sanded and use a scraper to get the old stuff out of there and will refill this weekend.  I also noticed a place on the nose block. When sanding epoxy started coming off on the sand paper. I again scrapped it away and will need to reapply in the area. Everything else feels cured and I will notice anything with the sander if there are issues.


I did a side project one evening. I had yet to cut the grab handle on the companion way slide. I cut it out below and will epoxy it to the slide this weekend. 


Next up will be to finish reapplying some areas of the hull with epoxy and to finish sanding. I already started sanding on one side of the hull. I will try to get all of this completed this weekend, so I can start on the fiberglassing next.

I am also reading up on some of the blogs about extra fiberglass on the bow and keel area. I think I am going to install extra wood on the bottom of the keel like some other builders did. They installed it forward and back of the center board. More to come with this.


Friday, July 13, 2018

Boat Flippin!

With the help of friends and family we flipped the boat over last night. It was not very difficult.
I had 6 tires and some moving blankets to use and we had 7 men.  We could do with less as others have stated on their blogs, but it was a good time to see some old friends and socialize.  It took all of about 30 minutes to do, but I did have some prep work and cleanup. Now on to finishing the bottom!!!! More fiberglass and my favorite sanding!!!


Here is the link to YouTube video I did of the flip.
https://youtu.be/7ULJFqZlfkE

The Flip was followed by Pizza and Beer!!!

Monday, July 2, 2018

Drain and Rudder Holes

Relaxing
I a pretty sure I am on track to take the longest to build Pocket Ship.  Life's daily chores and vacation kept me away from building last week. We enjoyed some time at the beach celebrating 30 years of marriage. 


Work on Boat
After spending so much time building on your boat, it is somewhat difficult to start drilling and cutting holes in it!  I made sure I measured 50 times before cutting into the transom this past weekend.

I first started on the drain holes in the cockpit. These were somewhat easy. I used a 1 1/4" hole saw.
I still need to sand and apply many coats of epoxy.


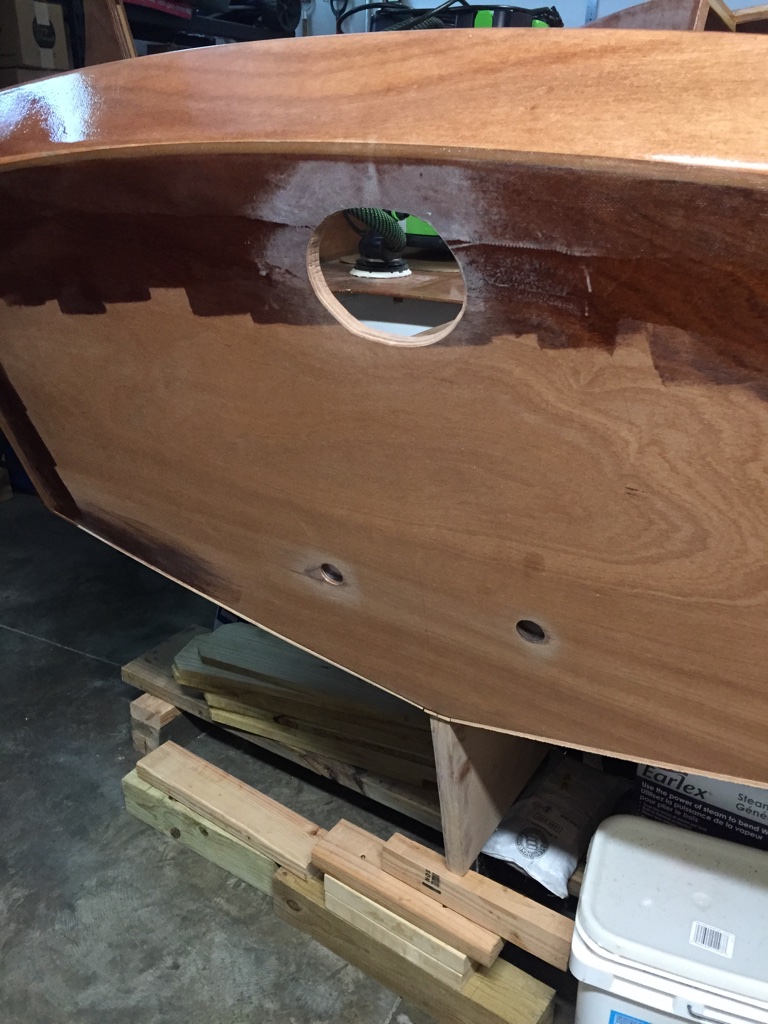
For the rudder hole in the transom, I deviated from the plans some. I have seen on other boats where they made more of a oval shaped hole. This turned out to be more difficult than I expected.
I first needed a pattern and actually had a piece of wall art that had the shape of the oval.
I sized it down some and made sure the inside of the oval would fit the 3" X 3 1/4" square that the manual called for.  I measured many, many times before drilling a few holes around the oval. I thought this would make it easier. What it did was created a bunch of edges that looked bad. I would have been better off drilling one hole and then using the saw to cut it out.

Well after messing with my dremel tool, sand paper, hand saw, wood rasp tool and just about any other tool I could get my hands on, I got it close. I still need to do some sanding to smooth out the edges, but it was getting too hot in the garage. I can take 84 degree heat but for so long! 

Cockpit drain holes and tiller hole.

I have been also been busy applying multiple coats to the companion way hood for the pieces of fiberglass I installed prior to going on vacation. I just did a rough scuff sand and applied 2 more coats.

I also applied fiberglass to the bottom of the rudder. I will add 2 more fill coats this week.