Sunday, August 12, 2018

Progress on Fiberglassing the Hull

I have been working a lot lately including some weekends, so I decided to take a comp day this past Friday to have a 3 day weekend. With this time I was able to finish up the sanding and make a big dent in the hull fiberglassing.  I went back over the entire hull with 120 grit and wiped doing everything. Prior to that this past week, I refilled some of the spots that didn't cure properly and refilled some holes.

Friday I started with one side of the bottom. This takes a full 50' wide piece of fiberglass. The first side I poured epoxy on and spread it with a plastic spreader. I then switched to the roller method, which I thinks works better. I used the roller method on the remaining portions.

Below are a couple of shots before I wetted things out.  This first side took me about 1.5 to 2 hours to mix up a lot of epoxy and spread out.


Saturday I did the other side. Below is the other side of the bottom with the fiberglass laid out before wetting out. I also did coat # 2 on the previous side.


It has been in the lower 90's, so I can take only so much working in the garage in 80 degree temperatures. I got up early this morning and laid out the fiberglass on both the upper side panels. I used blue tape in a couple of areas to hold the fiberglass in place until I could get it wetted out.

Below are both sides before wetting things out.


Here is a picture of the entire boat wetted out, minus the transom. I plan on doing that hopefully this week, maybe as early as tomorrow night after work.


Wednesday, August 1, 2018

Filling Holes and Sanding!

I went out of town last week for 4 days, so that limited time to work on the boat. But as I have said before, taking the wife to a Bed and Breakfast makes any mess in the garage I make much easier for her to take. I have fun too.

Filling Holes
After I got the hull turned over, I started to work on sanding the rub rails. When I first installed them, I didn't do any of the tapers or angles. I just glued each piece on and decided to use a belt sander to level out when I flipped it. This was a little bit of work. I had some 80 grit, but it was taking a lot of work, so I went to the store and bought 30 and 60 grit. That did the trick! Be careful!

Below are pictures of port and starboard rails. After flipping, I discovered a couple things that I will need to address.
1) I think I will put a very small fillet between at the edge of the hull where the 1st piece was epoxied on. There are a couple places that I see space where water can get in.
2) I also noticed a couple places between the pieces that didn't get filled with epoxy. I am very surprised with this. I put a lot of epoxy on each piece and it pressed out.

Nothing that can't be fixed.

Rub rail


Next up I decided to fill all the holes and the edge you can see above between the bottom and side panels. I know this is supposed to be a round over, but I have a gap that I think needs to filled. I will also round it over as well.

Below you can see where I have filled all the holes.


Filling the edge between the lower and upper panel. 

Also did a large fillet along the keel.


I did all of these in one session and let them cure for a couple of days. As I was packing up to leave, I was walking around and noticed that some of the epoxy was not curing. It was soft and it had been 4-5 days. I used the pre-mixed epoxy in a tube I got from Jamestown Distributors. The only thing I can think of is that I rushed and didn't properly push out a little epoxy before using it. That allows for it to properly mix. I used a couple of tubes and recall just putting the cap on and applying it. My fault!

Below is a section that was not curing. I sanded and use a scraper to get the old stuff out of there and will refill this weekend.  I also noticed a place on the nose block. When sanding epoxy started coming off on the sand paper. I again scrapped it away and will need to reapply in the area. Everything else feels cured and I will notice anything with the sander if there are issues.


I did a side project one evening. I had yet to cut the grab handle on the companion way slide. I cut it out below and will epoxy it to the slide this weekend. 


Next up will be to finish reapplying some areas of the hull with epoxy and to finish sanding. I already started sanding on one side of the hull. I will try to get all of this completed this weekend, so I can start on the fiberglassing next.

I am also reading up on some of the blogs about extra fiberglass on the bow and keel area. I think I am going to install extra wood on the bottom of the keel like some other builders did. They installed it forward and back of the center board. More to come with this.


Friday, July 13, 2018

Boat Flippin!

With the help of friends and family we flipped the boat over last night. It was not very difficult.
I had 6 tires and some moving blankets to use and we had 7 men.  We could do with less as others have stated on their blogs, but it was a good time to see some old friends and socialize.  It took all of about 30 minutes to do, but I did have some prep work and cleanup. Now on to finishing the bottom!!!! More fiberglass and my favorite sanding!!!


Here is the link to YouTube video I did of the flip.
https://youtu.be/7ULJFqZlfkE

The Flip was followed by Pizza and Beer!!!

Monday, July 2, 2018

Drain and Rudder Holes

Relaxing
I a pretty sure I am on track to take the longest to build Pocket Ship.  Life's daily chores and vacation kept me away from building last week. We enjoyed some time at the beach celebrating 30 years of marriage. 


Work on Boat
After spending so much time building on your boat, it is somewhat difficult to start drilling and cutting holes in it!  I made sure I measured 50 times before cutting into the transom this past weekend.

I first started on the drain holes in the cockpit. These were somewhat easy. I used a 1 1/4" hole saw.
I still need to sand and apply many coats of epoxy.


For the rudder hole in the transom, I deviated from the plans some. I have seen on other boats where they made more of a oval shaped hole. This turned out to be more difficult than I expected.
I first needed a pattern and actually had a piece of wall art that had the shape of the oval.
I sized it down some and made sure the inside of the oval would fit the 3" X 3 1/4" square that the manual called for.  I measured many, many times before drilling a few holes around the oval. I thought this would make it easier. What it did was created a bunch of edges that looked bad. I would have been better off drilling one hole and then using the saw to cut it out.

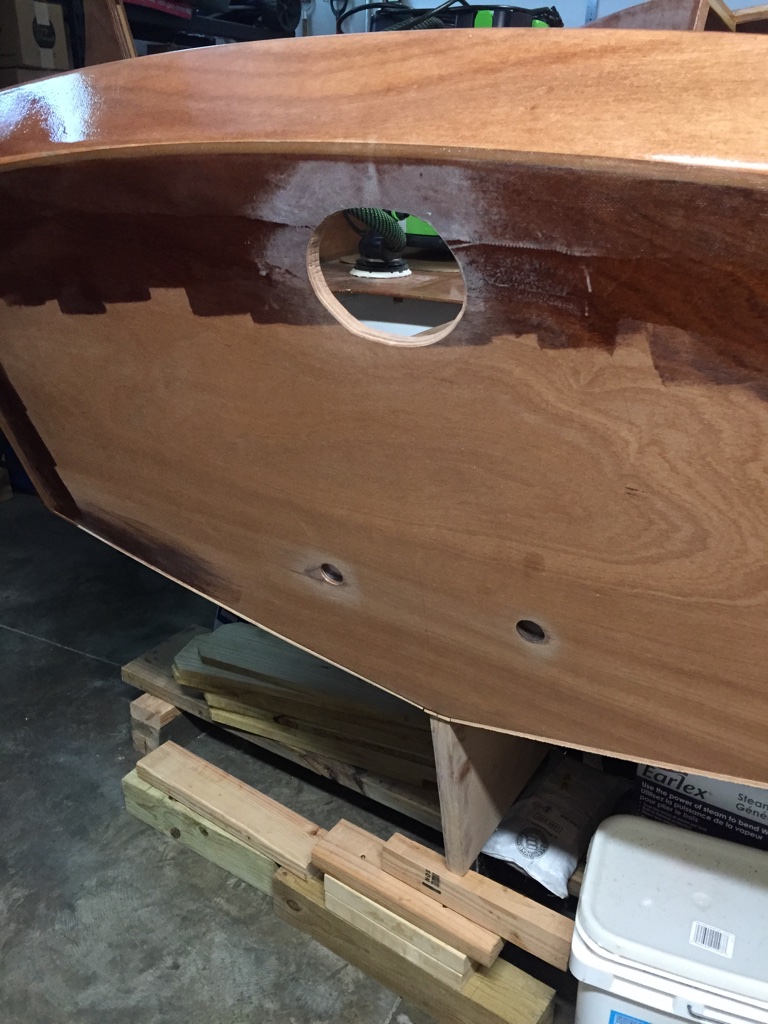
Well after messing with my dremel tool, sand paper, hand saw, wood rasp tool and just about any other tool I could get my hands on, I got it close. I still need to do some sanding to smooth out the edges, but it was getting too hot in the garage. I can take 84 degree heat but for so long! 

Cockpit drain holes and tiller hole.

I have been also been busy applying multiple coats to the companion way hood for the pieces of fiberglass I installed prior to going on vacation. I just did a rough scuff sand and applied 2 more coats.

I also applied fiberglass to the bottom of the rudder. I will add 2 more fill coats this week.


Wednesday, June 20, 2018

Companion Way Flange and Rudder Work

Companion Way Flange and New Epoxy
This past week or so, I have been working on some little tasks, but I guess that's what the whole build is about. A bunch of little tasks.  I had already glued up the companion-way flange a while back and coated it with a few coats of epoxy. I finally decided to glue it to the companion way opening. For the epoxy part of the job, I decided to try out some new epoxy in a tube that I purchased from Jamestown Distributors.  What I purchased was the TotalBoat Thixo Wood 2:1 Expoxy System.  I found it difficult at first since the caulking gun I had was not strong enough. I ordered a heavy duty one from them as well and it work like a charm.  Below is a picture of the gun and epoxy. You purchase the tips and depose of them after each use.  Only one application per tip. There is a top that screws back on, so you can reuse, which I did.  I have used it a few times and are very satisfied. The only issue I would have is the cost. 


Below is the flange epoxied on. 


This is after the initial glue up and an extra coat of epoxy. 


For the companion way hood, there is a portion that I didn't fiberglass. The manual really doesn't show it or talk about it, but I decided it was easy to do.  You can see the portion in the picture below. I will do the other side as well. 


Rudder

I used the caulking gun with epoxy to do the fillets on the rudder.  I was impressed on the mix consistency of epoxy. It made very smooth fillets. I wish I would have done this on the epoxy fillets for the bulkheads, but it wouldn't have been cost effective. 


Fillets on Rudder

After I did the fillets, I applied fiberglass to both sides of the rudder and down onto the bottom portion across the fillet. This should make that joint very strong. 

Epoxy applied with 1 coat. 

When I was installing the blocking on the seat backs, I went ahead and drilled the holes for the boom gallows. I then covered them up with the seat back top.  To get the hole cut, I drilled up from the inside and created a hole. I then used my router with a cut-off bit and just went around the hole. 

I have also been coating it with additional epoxy as well as the other holes for the hatches and dorade vents that I recently cut. 

Both starboard and port holes ready for the boom gallow poles. 


Still planning on the flip. I purchased some moving blankets and need to get some old tires from some place. Will try to get this done in a couple weeks. I have plenty of tasks to keep me busy.

Sunday, June 10, 2018

Cutting Dorade Vents and Hatch Openings

I decided to do some of the smaller tasks this past week.  I started off with the Dorade Vents. I purchased the hardware kit from CLC, so I am use the Dorade Vents and hatches that they provided.

For the dorade vents, I tried to establish a center method of measuring, so I can have both sides looking the same.  Below is the port dorade box hole after I drilled it. I used a 3" hole saw bit.  I drilled a pilot hole for the center and then used the hole saw bit. Not very difficult, just takes a while to find the center and you are alway scared about drilling into your boat.


The starboard dorade vent dry fitted. It will be install once the hull is painted. 


Port side hole drilled and vent dry fitted. 


I made a pattern out of cardboard for the hatches. I then measured/traced on both sides and cut them out with a saber saw. I then had to use a rasp and hand saw to get them to the final shape. I plan on coating the edges of these holes and the dorade holes with epoxy for water proofing.


In preparation for the plywood flange around the companion way opening, per the manual I used a rasp to angle the edge, so that water will not stand there. I already have the flange ready. I will probably glue that this week. 


I rough cut the rub rails. I still need to fill the screw holes with epoxy and need to do some sanding and the final shaping. Still a lot to do on them.


I think the rails turned out pretty good. At least they are not bumpy!! 😀 


Next up: I have been putting off sanding, but I know I will need to get the top part of the hull sanded. I will be working on that some this week. I am also planning on flipping the hull and figuring out what my plans for that will be and who I can get to help. 


Friday, June 1, 2018

Rub Rails and Rudder

Sorry about the delay in updates, I have been busy with normal life and yard work!

I have been working on the boat where I can and have made a lot of progress on the Rub Rails. As of today, I have 2 of the layers attached on both sides. I used the timber kit, so the rails are made out of mahogany. For the most part, they are pretty easy to bend. The first layer of rails, I did use the hot water and rags to pull them in. To help, I used a tie-down ratchet strap to force the last few inches. I also dry fitted each and used screws to hold in place. I used little blocks of wood as to not damage the rails.  Both of these tricks I found from other builders blogs.


This is the port side with rags soaked in hot water.


Too get that last couple of inches I used the ratched strap below.


Below is the layer epoxied in place. I used about 4-5 ounces of thickened epoxy using cabosil. I brushed it on with a chip brush. I was worried about doing this by myself, but during the dry fit, I made little marks on the wood to realign. With the dry fit, all the holes are pre-drilled, so I just had to align things. I used some small pieces of rope to hold one end, while I worked on the other. It is manageable with one person, but if you have a helper, that would definitely work better.


Picture below is of the 2nd layer done on the Starboard side and it looks like I am working on the port side. I only did one side at a time, since I wanted that little piece of wood sticking out to hook the ratchet to.


This is the last layer below dry fitted a couple of nights ago. I am going to epoxy it this Sunday.


I also managed to epoxy the bottom piece of the rudder on. I tried some new epoxy in a caulk gun ready made that I got from Jamestown Distributors. The gun was not strong enough to get the epoxy out and I had to really struggle. I ordered another heavy duty gun to use, so hopefully that works better. It was something I wanted to try, but I think my final opinion will be that it is pricy for what you get, but the decision is out. 


Also on the bottom piece, be sure to notice the direction it is supposed to go on. I had pre-drilled the bottom piece on in the wrong direction and just caught it when I was applying the epoxy. Almost a big oops!