Wednesday, January 24, 2018

Rudder Work and Companion Way Trim

Rudder
Last weekend was very nice. Up in the 60's / almost 70. I was able to do some work.  For the Rudder, I was able to epoxy up one side and it has been curing for a few days. This weekend I plan to epoxy the other side. I used a combination of many clamps as well as some free weights to make sure I had enough pressure.

Below is a picture of everything all clamped up. I am using some work lights to help with the curing.


With using epoxy in the winter months,  it seems to thicken up to the point it is hard to pump out the resin and hardener.  I store the epoxy inside in my utility room and move it into the garage when I am planning on doing some work. I also bought new pumps for both, but it still seems to be hard to pump. This past weekend, I used a work lamp and shined it on the epoxy. I think this really helped with the flow.  It was enough heat to keep the containers warm. By the way in the winter months, I use the small jugs and fill them up from the larger 5 gallon ones. Easier to move around. 


 Companion Way Trim

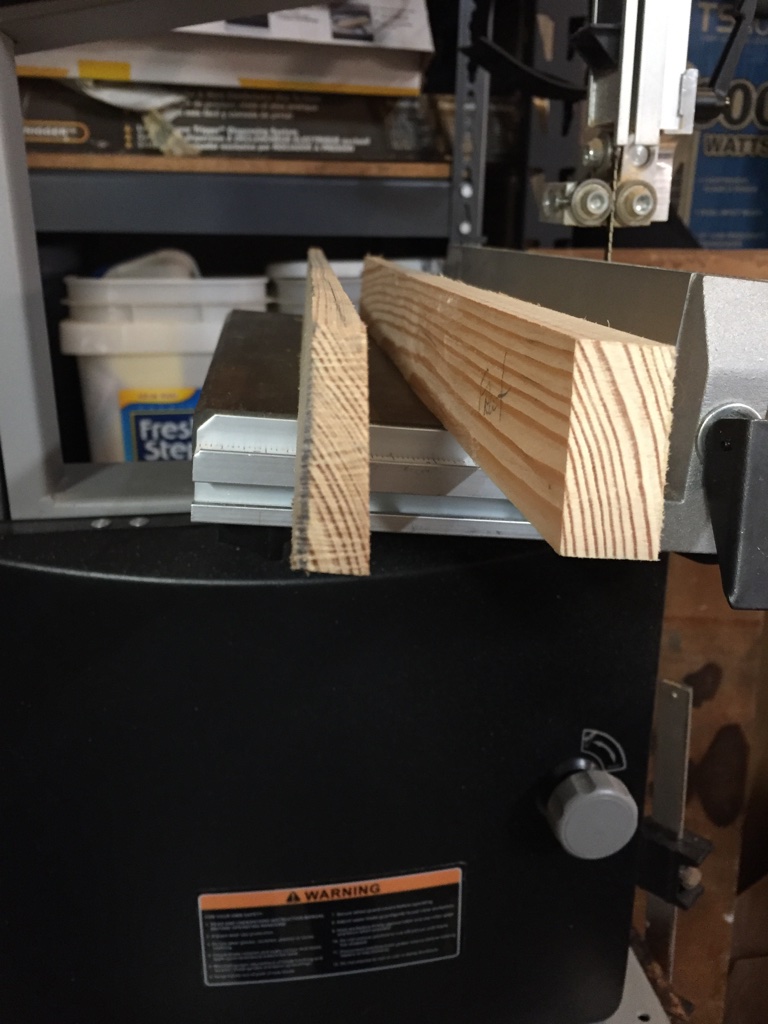
While one side of the rudder is curing, I decided to work on the companion way trim. This was a little bit of wood working, but fun all the same. For both side pieces, you need to find the angle of the cabin decking. This was easy using a T-bevel. I then took this angle and adjusted the bandsaw / tilting the table to the angle and using the rip guide. The 2 side pieces were already milled from purchasing the timber kit, but I just had to cut.  I cut one and tried it on both sides to make sure it fit properly.  Without moving the bandsaw, I cut the other side piece.

The manual tells you about the one angle of the cabin decking, but looking at the plan drawings, it shows the topside cut at an angle as well. I forgot to mention that I used the rip guide on the bandsaw.  For the second cut, I kept the exact same angle, but had to adjust the rip guide.
I guess if you are milling your own pieces, you would have more to work with except for the 1 inch board that I had. I didn't want to take too much wood off.  Below is a picture of both port and starboard trim pieces. I guess the topside angle will cause any water to drip off to the outside.


Picture showing the too cut pieces. Oh the cat litter box with the top is what I store my epoxy in to take it into the house. It doesn't smell, but didn't want any comments from the boss!!!  Out of sight, out of mind!


For the bow section part of the trim, I took a scrap piece of wood to use as a pattern. It was wide enough to fit inside the opening, so I could mark the angle going all the way across.  I decided to make an exact template to then use to cutout the final piece. If you look at the piece on the left, you will see a pencil mark. This is the height I got from the 2 side pieces. I cut that out and then cut the final piece using that as a template. I first made sure the test piece fit right and it did.


Below is a picture of the 3 trim pieces epoxied and clamped up. I started to run out of clamps. :)


I will be trimming the long pieces later this week and doing the other side of the rudder. With it still being cold, I will start on the companion way hood. This should give me plenty of work to do.

Wednesday, January 17, 2018

Still Cold, but working on Rudder

Still very cold, so it is putting a damper on my boat building. Last Friday, I did have a good day and it actually got up to 70. I had the garage door open and was able to put the 3rd coat over the cabin decking. Before I did that I did a rough sanding using 120 grit.  Any large epoxy jobs will definitely need to wait until warmer weather.

After the 3rd coat, I started to work on the rudder. I figured this was some work I can do in the cold and I can get all the parts cut out and ready to put together. Hopefully this coming weekend I can epoxy.

With the rudder, there is a taper going from front to back or bow to stern. This means you have to taper 3 different pieces of wood. The kit comes with the patterns, so you can easily get the rough pieces cut. The others I had to do some thinking and decided to use my bandsaw to cut them out.

So with the picture below, the taper is going from right to left. I just have everything clamped together waiting to be epoxied.


Below, I cut both of these pieces on the bandsaw and fined tuned them with a block plane.
The piece to the left is the long vertical piece and needs to taper down to 1/4 inch,
The one on the right is the bottom of the rudder and tapers from the 3/4 inch to 1/4 inch at the rear.


 Below is the horizontal piece. I just put the template on it and cut it out with the bandsaw.


The large triangle piece was a little more difficult. The manual shows using a grinder to shape the piece, but I don't have one. I decided to use my rasp to take the majority of the wood off after I marked it. I then used my orbital sander with 60 grit to do the finishing sanding. I think it took me all of about 20-30 minutes.


The dry fit looks like everything went together very well. I will just need to do a little bit of sanding once I get things glued down.  I also need to put another coat of 2 on the large plywood pieces.


Friday, January 5, 2018

Too Cold!

Old man winter has definitely put a halt to boat building. It has been basically below freezing for the last two weeks. I am unable to keep the garage at a comfortable temperature to work. It is supposed to warm up into the 40's next week and I can usually with a small heater raise it to the mid 50s to be able to work.

Before it got bitter cold, I was able to do some work. I installed the backer board for the tabernacle. I applied a large helping of thickened epoxy with cabosil. Then I used temporary screws to hold it in place from the inside and outside. I then rigged up a work light to shine on it so it would cure.


The method of a work light works pretty good as long as it is not too cold. The highs have been in the 20's with lows in single digits. I am ready to move to Florida!, but I think a lot of the country has been dealing with this cold. 

Below is a picture of coat number 2 of epoxy. I still need to get the 3rd coat on, but it will need to warm up some. Before applying the 2nd coat, I used 120 grit to do a light sanding to rough up things. 


I rigged up a 2x4 clamped to my work cart to hold the lights. 

I think with this cold, I may need to start working on some bench projects like the rudder and companion way. I can get things all cut out and epoxied using the work light method. I am afraid to do too much large scale fiberglassing until it warms up some. I have plenty to do, but it definitely needs to get a little warmer!