Wednesday, August 31, 2016

Last of the fillets in the bottom hull area or is it?

Well I finally finished the fillets in the bottom part of the hull! I looked back at my posts and it took 8 sessions. So with an average of 3 hrs per session, it took me about 24 hours of filleting. I have one bag left out of a box of 50, so that was 49 batches of thickened epoxy. I have my new detailed sander coming tomorrow, so I will start sanding later in the week after they cure. I may have to do some more fillets depending on how they turned out. I did an average job. It will be ok, but I am planning on a fair amount of sanding. I also found a dremel type air tool I bought in a kit a few years ago. It has all types of attachments and will come in handy with some of the trouble spots. I will let you know how they both perform.

I will say a hint to doing fillets is the temperature. I would say the average temperature in the garage has been in the low 80's. This means the fillets will harden very quickly. One trick to smooth them out is using denatured alcohol,  but I found the fillets were hardening at 30-45 minutes and I am using slow hardener. By the time I laid 1st fillets out and used the tool, mixed another batch and laid the 2nd batch, the 1st batch was about hard.  I think I would have done a better job if the temperatures were lower, but it is what it is. I was not going to put building on hold during the summer. I think temperature is just something you have to deal with warm and cold! If you can coordinate doing the fillets in cooler temperatures, I would recommend it.

Port side chine next to bulkhead #3. 

Transom Fillet. I put more epoxy on to make it bigger. 

Starboard side chine next to bulkhead #3

Chine area in between #2 (left) and #3 (right). I again wanted to make the fillet larger.

I started this post last night, so I have had a chance to look at the boat today. I was mainly looking at the size of some of the fillets. I think I will be enlarging a few of them. The manual says at least 1", so a couple of them are borderline. Better to take the time now than to have issues later. I also always tend to over engineer things when I build! 

Sunday, August 28, 2016

Yes! More fillets!

Did I tell you I like doing fillets?  It is hard to believe I  bought a box of 50 pastry bags and I am about out. I will be ordering another box later today. There is a lot of fillets in PocketShip and you will become very familiar with them! I did a 4 hour session yesterday and a 3 hour one today. Today I worked in the area between bulkhead #1 and #2. I am finishing them up and will hopefully be done this week and can start sanding in preparation for the fiberglassing soon. I already know I will probably be doing some of them over, meaning putting a larger fillet over some of the rough ones. I also want to make sure some of them are larger to offer more strength.

I also replaced the pump on the hardener. It was getting very hard to push. I think I will replace the one on the resin next session as well.  I was wondering why my biceps were hurting one day after working on the boat and I just realized it is because of the pump and being hard to push.

Below are pictures of the fillets in bulkhead #1 and #2.


Saturday, August 27, 2016

Big Fat Fillets!

I worked on the bow area today and mixed up about 6 batches of epoxy in just the bow area to bulkhead #1. To help protect the bow, I used very large/fat fillets. I want to make sure that if I run into anything that there is enough support to avoid any damage. I used multiple layers / batches of epoxy. At a later date, these will be reinforced with fiberglass clothe and tape.


Thursday, August 25, 2016

More Fillets and taking a day off to go sailing!

I did some more filleting a couple of nights ago and finished up the fillets in the bottom of the boat.
I still have the chines to go on both the port and starboard side as well as the bow section with bulkheads #2 and #3. I plan on tackling them this weekend.

I also ordered a detailed sander from Harbor Freight. They had a good deal on a detailed sander, so I decided to try it. This is the first time I have ordered anything from them, so hopefully it is not a piece of junk.

Below is a picture of the work I did the other night.


I also decided to take a day off to go sailing. The weather has been very nice, so my wife and I took off and took our Hobie Tandem Island out. The wind was very light, but we had fun and I didn't have to work!!! 


Sunday, August 21, 2016

More Fillets!

I continued to do more fillets this morning for a few hours. To make it a little easier, I decided to clamp a  board to the floor supports, so I can climb into the boat to work on things. This worked out pretty good and was definitely easier on my back. I also had purchased a step ladder to make climbing in and out easier. 

Below is a picture of the board and ladder. I clamped the board on both ends, so it would not flip up on me if I stepped in the wrong place. I also put an extra box of rags inside the boat as well as the fillet tools, so I would not have to climb out if I forgot one. These box of rags come in real handy to wipe off fillet tools and putty knifes. I use them all the time for many different things. 


Below is the finished product, I was able to get the port side of the boat completed up to bulkhead #2 on the floor supports. Still have the chines to do on both sides. I will work on the the starboard side of the boat early next week and then I will probably need a full session to do the bow.  I easily see 3 more sessions of fillets. 


Helpful hint: 
To help not getting epoxy all over the place, I am mixing it at my workstation and then putting it in pastry bags.  A shout out to Jeff Perkins "Old Soul" PocketShip for the helpful hint of using plastic wire ties to hold the twists on the pastry bags from coming undone. As long as you have the mixture firm enough and use a plastic wire ties,  you won't get epoxy all over the place. I used the box below with newspaper to sit it on while I climbed in the boat. A sort of "Epoxy Serving Tray" :-). 


Saturday, August 20, 2016

Removing Cables and more Fillets!

I spent a good 5 plus hours today working on the boat, but visually there is not a whole lot to show. I spent the first part removing all the cables. That look about 2 hours to remove what I removed. I left the bow area ties in until I am ready to do the fillets in that area. I had to use the heat gun to remove some of the ties that were embedded in epoxy.

bucket full of used cables

I also cut out a portion of bulkhead #7 on both sides, to allow room to do the fillets down the side of the boat. I left enough of them to help protect. 


I mixed up about 7 batches of epoxy and did the fillets in the bulkhead #7 to #8 area as well as some of #6. I find it very difficult to reach into the boat to do the fillets, but doing the best that I can. It is also hard to fillet around floor supports.  I am definitely going to have to do some sanding on the fillets once they cured. Not a huge deal, just more work! 


Below is the finished work. As soon as it cured I will start to do some sanding. I am also looking to get a new detailed sander. I will probably be going to the big box store next week to purchase one. 


Thursday, August 18, 2016

Good idea, bad execution!

Well the blue tape was a good idea, but the over runs dried before I could pull it up. I had to cut some of it out and this made some rough edges and more work. I am not making too big of a mess with the pastry bags, so I think I will continue without the tape. My recipe for epoxy fillets is working pretty good. I and getting a consistent mix, so it is not dripping all over the place.

I used some denatured alcohol tonight for the first time and it helps to smooth the fillets.  The biggest problem is knowing when to use it. The fillets are drying very quickly. Basically in about 30 minutes. Just something I need to be aware of with managing my time and plan for.

I finished up bulkhead 8 area tonight, but I think I will add some more fillets over the existing ones in a couple areas to smooth out some rough spots. It took about 5 mixes to complete.  On the bottom panel / keelson joint, I made one wide fillet. Don't ask me why, it just happened. :-). I  think I just added too much epoxy without thinking, so once I started, I had to finish it. No harm done.

Here are a couple of pictures from last nights work. I use the newspaper to lay tools on that may be covered in epoxy. Helps with the cleanup.


Tuesday, August 16, 2016

First Fillets

I did a few fillets in the transom / bulkhead 8 area this evening and I think they turned out pretty good for my first attempt. With more practice, which I will definitely get, they should get better. If I have one area of improvement, I think it will be to make sure I apply enough epoxy. It is easier to scrape off some with the epoxy tool vs. trying to add and make mud pies.

I didn't have a lot of time to work on them, but I mixed 2 batches and applied them.  Last night I did a lot of the prep work. I took the opportunity to vacuum out the area and used some painters tape to tape around where I was going to apply the fillets. I am not sure I will need this moving ahead. I think if I can get the right fillet mixture that I can keep from getting epoxy all over the place. I have seen this procedures on other blogs and thought it was a good idea. I will just decide as I go.  Last night I also mixed up some 90/10 wood floor/cabosil, so that it was available to mix in the fillet mixtures. I also had my epoxy tools and putty knifes ready once I applied the epoxy from the epoxy bags.

Couple pictures of taping out the fillet areas to keep things clean.


Couple pictures of the fillets. 


Saturday, August 13, 2016

Tack Welds all done!


We are still fighting the heat in Virginia, so I got up early this morning before the heat got really bad. I worked for about 5 hours in the garage and finished all the tack welds. Glad that is over. Reaching over into the boat is not an enjoyable task!

I premixed the cabosil and wood floor before starting on the fillet mix with the 90/10 mixture and began mixing up the first of 8 different mixes. I use red cups to mix, since they are cheap. I use the mark on the cup to fill up with thickened epoxy. I will then mix in about the same amount of the 90/10 mixture. I will add a spoon full or so to get it thick enough so it won't fall off the mixing stick. So using these marks, takes some of the guess work out and makes it a little more of a recipe.


I will then pour the mixture into a pastry bag. I watched a OffCenterHarbor video and the trick is to twist the bag. I was just trying to roll it up and that didn't make it tight enough.  The twisting does the trick. 

Even with the tack welds, I tried to use a fillet tool to smooth it out and make sure the epoxy mixture was making good contact with all edges. I used a variety of tools including a putty knife. Some of the tools are pictured below. I didn't start to use the one on the right until the last batch. I think I like it a lot. It allowed for a lot of different angles. I think I will be making more of them.

Fillet Tools.


Below are some pictures of the finished tack welds. I will definitely have to put some wider fillets to cover up the sloppy tack welds, but without trying to work around cables will be much easier. 


Friday, August 12, 2016

Still Stitching, Adjusting and 1st Tack Welds

I am getting back from a mini vacation and doing yard work for about the last 7 days. Finally got some time in the garage to work on the boat. I have just about finished doing the stitching, but I had some trouble spots I needed to redo. Before I worked on that, I had to make some things to help me work in the boat. Since I have the boat on dollies, I made a small platform that raises me about 8 inches. Even with that and my taller work bench that I stand on, you need 4 foot arms to reach in the boat.


Cross bars to hold on to while reaching in.
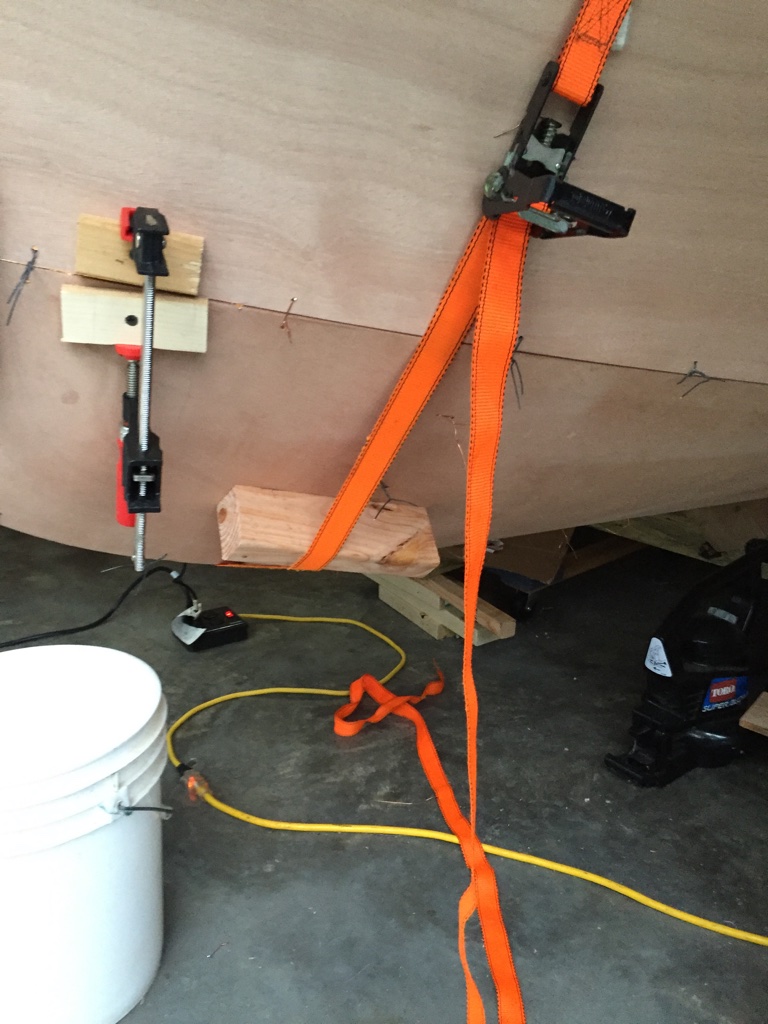
In the above pictures, I screwed blocks to the cradles. This allows me to clamp some 2X4's to them to act as a safety bar. I can hold onto them with I am leaning in as well as climbing in. I don't see any other way besides climbing in to do some of the work. I will limit myself to those far to reach spots.

Some of the trouble spots are towards the bow. Imagine that! Floor support #3 was a pain and I had to  work on #2 in a couple places. I had to add some extra cable holes to be able to pull the bulkhead down to the bottom panels. 

1st Tack Welds
After I got everything lined up and tied, I vacuumed every thing. I then started to work on the tack welds. In the manual, it recommends using wood floor and cabosil with a 90/10 mixture. So I used a spare plastic cup and used a small scoop to measure things out. 9 scoops of wood floor and 1 of cabosil. I then mixed it up. 

Now I read on one of the other forums a mixture for the fillet mix. I recalled it being adding the same volume of wood/cabosil mix to thickened epoxy. I started out with this on the 1st batch I did tonight and it was slightly runny. On the second batch I added a little bit more and I think this will be a good formula moving ahead. 

Now on to the pastry bags. I bought some on Amazon and they seemed to work good. I need to figure a way to get a consistent pressure when squeezing it out. I started with a small amount cut off the end of the pastry bag, but I would get spurts of epoxy mixture coming out. 

I definitely think practice will make things better and once I can get the cable ties out I don't have to start/stop and start/stop. 

Another thing I did notice was that a flat putty knife works well on the flat bottom/keel joints. It works better than the round Fillet tools I bought from CLCBoats. The Fillet tools worked good on the other joints. 

Below are some pictures of the 1st tack welds. I was able to get the rear transom and bulkhead 8 completed. I will continue tomorrow. When I get to the point of doing the fillets, I think I will tape everything out. I made a little bit of a mess in some spots, but nothing that can't be sanded. 


Wednesday, August 3, 2016

Continued Stitching and Tuning

Work and family have taken a lot of my time this week, so I have been limited on the amount of time I can work on the boat. Not a lot to show, but a lot of thinking of how to get the different bulkheads and long panels to pull together.  Looks like the majority of the bulkheads pulled together fine. I do have some tuning to do on bulkhead #1 and #2 where they contact the bottom panels.


I put a work light behind the #1 bulkhead so you can see what I am talking about. The left side of the picture had the same gap as the right side, but I used the method below to pull it together. I will be working on the right side next session. I have also added some additional cable holes to help.


I will have to take a picture of the bow. I got that all pulled together using the 2 blocks and a clamp bring the two pieces together. You can see the clamp in the above picture.


Adding a picture of the Bow. I am please with that.


Monday, August 1, 2016

It looks like a Boat!

I have read a lot of other blogs and this is definitely a moment to remember in the build. I was stitching the panels together last night and my wife came out in the garage. She hasn't said too much about the build. I normally get the look as she walks through of what are you doing? , but she says nothing negative. I know she probably thinks I am crazy, but I know she supports what I am doing which is great to have. When she walked out she said "It looks like a boat", which made me very happy. You spend a lot of time building "parts" with no real results other than "hey, I finished that part".

Attaching the side panels

Below are some pictures of the side panels stitched in. If you notice the rags hanging on the boat, I hang them there because there is not a lot of room to walk by and I don't want the cables to catch on clothing or even worse my hand or arm.


Transom 

After getting the side panels attached, I worked on the transom. I didn't do a very good job of cutting the angle. I followed the instructions, but didn't get the angle that I needed. I tried to resolve, but I didn't want to keep taking wood of with my block plane. I decided it was good enough and I will fill the small gap with epoxy. The transom will be coated with fiberglass, so everything will be fine.


Clean up and more stitching

I cleaned up the garage and made room, so I can walk all the way around the boat. I have it blocked up some, so it will not roll and to level it. I managed to get bulkhead #2 stitched in as well as some of the smaller floor supports. I had to stop to attend to yard work.


I have a few more bulkheads to stitch in. #7, #8 and some of the smaller ones. I also have to work on the bow. I still need to get things lined up correctly and all the joints pulled tight, so there is no spaces. I will be working on these this week in hopes of starting to tack weld next week.