Monday, June 1, 2020

Spars Hardware and Trailex Trailer


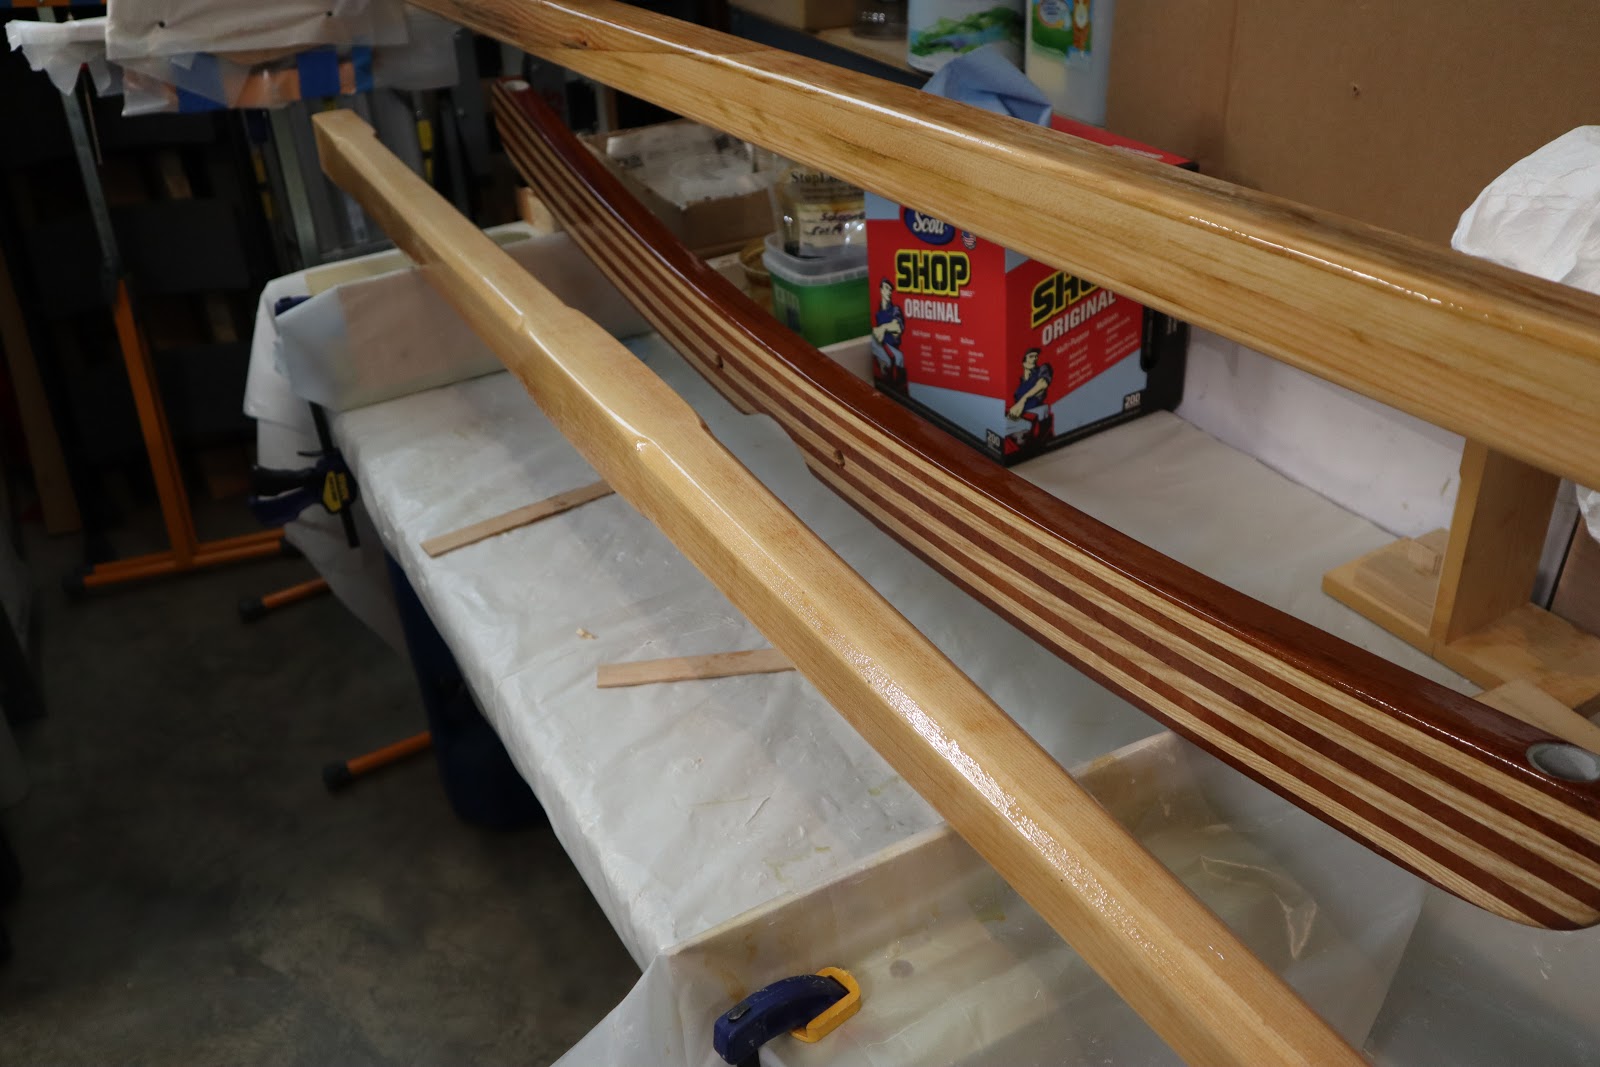
I finished up some of the spars with 2 coats of epoxy and 5 coats of varnish. I applied it with a foam brush and they turned out pretty good if I say so myself.


For the bowsprit, I installed all the hardware on it and did a test fit and connection with the bobstay that attaches to the boweye.  With COVID-19, it has been a little difficult getting the bolts that I needed. I wound up ordering some of them online, so I wouldn't have to visit the local stores.


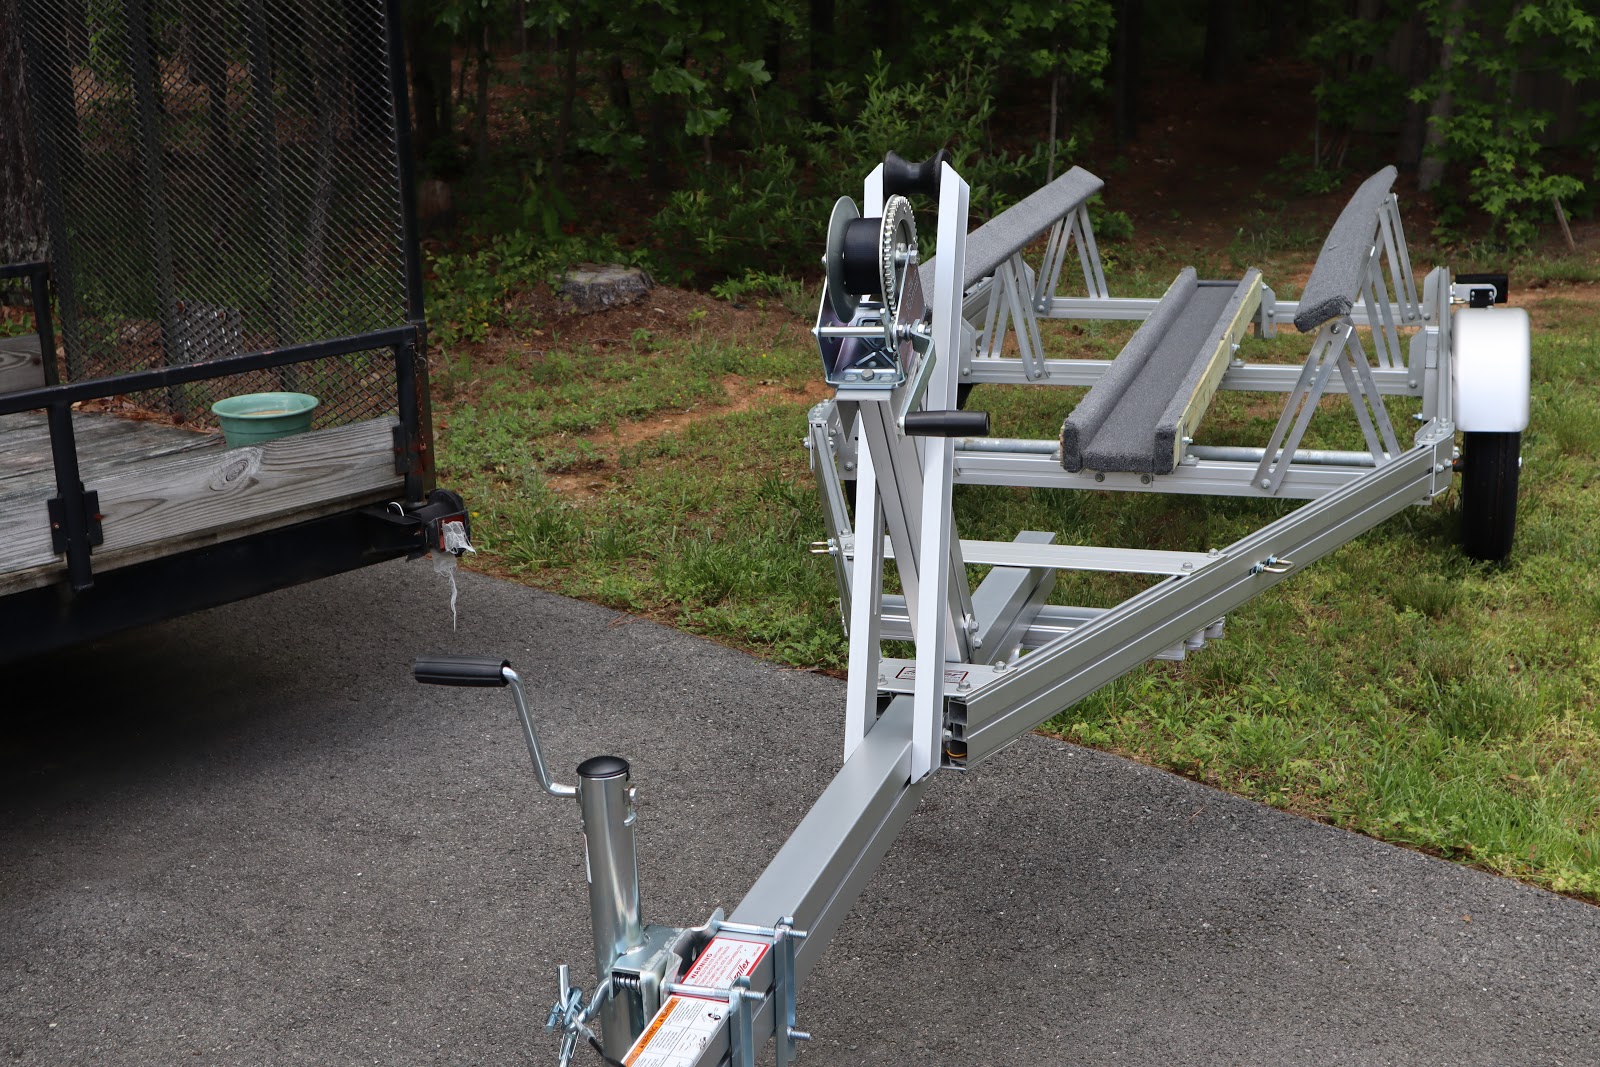
With the recent sale at CLCBoats, I decided to order my Trailex Trailer. It took about 4 weeks as expected and arrived partially put together. Below are a couple pictures of when it arrived.


I didn't have any "Salty Language" when putting it together! LOL. I will say it did take me about 6-8 hours over a couple of days to get everything put together. I was able to do it alone, but having a helper would have definitely helped. Since it is a custom trailer, they don't have custom instructions, but it is pretty straight forward. Trailex was able to guide me through it using other trailer documents and answer my question. Very helpful!

I got the axle and springs attached the first day.


Below is everything put together with the winch. It does come with a spare tire, but I will just keep that in the back of my truck.


I will need to adjust the bunks on the side once I get the boat on the trailer.


In parallel, I have been working on the mast and gaff. Since I had to work all day yesterday Sunday, I took off a little while ago and put the first coat of varnish on. 


Tuesday, April 14, 2020

Spars and Hardware

Sorry for the delay in posting. Been a lot going on. I guess that is an understatement!  Me and the family are doing well as I hope everyone else is. Actually I have had a little more time in between the expanded honey-do list to work on the boat and haven't posted any updates. There is so many pictures you can take off coat 1, coat 2, coat 3 of epoxy.


 Drill-Fill-Drill
 I have been doing a lot of drilling out of the holes for the hardware, refilling with epoxy and then drilling out the final.  This has been a lot of measuring many times before drilling and also trying to rig up a means to use my small drill press and making sure the piece was level.

Below I am working on the BowSprit. This is the part that will be bolted to the tabernacle!


The picture below is the gaff where the gooseneck will attach and then slide up the tracks on the mast. There is also a tie down on the other end where I drilled and filled as well. 


The is the top of the mast where there are a lot of hardware to be installed. I have completed the drill-fill-drill and have set aside to epoxy and varnish later. I am running out of space to work.


With the limited amount of space, I can only work on a few pieces at a time. Below is the boom, gaff, boom gallows.


This past weekend, I was able to get the 2 coats of epoxy on the spars shown below. I plan on sanding these and then starting on applying the varnish. All the holes are drilled, except for the track holes and 1 or 2 pad eyes. 


I also installed on both the port and starboard the Harken Swivel/Cams for the Spinnaker Sail.  I haven't purchased that yet, but this will be a good place to tie a boat fender.  I am glad I wrote down the exact measurements of the blocking that is installed underneath. I would highly suggest doing this. I installed extra blocking to allow me about 16 inches. I installed it approximately in the middle.


I went ahead and purchased the Trailex Trailer from CLCboats, so I am getting real close to getting the boat out of the garage!!! I still have a lot to do, but knowing that makes me happy!!! :)

Sunday, March 8, 2020

Varnish and Other Hardware

The last month has been a rough one fighting a bad cold, so not much working on the boat. I have tried to do some when feeling up to it, but only a little progress has been made.

I have been able to varnish some components on the boat. Below I have applied 4 coats of varnish on the companion way slide and a couple of small pieces like the tiller.


Below you can see where I taped off the rub-rail and also have applied 4 coats of varnish. I have had to wait for some warm days, which have been limited. In between the coats, I lightly sand with 320, vacuum and then wipe off with acetone and allowed to dry.


Today I also installed some deck plates on both port and starboard dorade box inside the cabin.  This will allow me to close or open for ventilation.


It should hopefully be warming up more soon, so I can complete things to get it on the trailer. I want to do a final paint coat in some places where it needs touching up, but it will need to be a lot warmer. Varnish low temperature is 50 degrees to apply, so I have been focusing on that and the hardware.

I also have been purchasing some electrical components and making a plan for those as well.

Sunday, February 2, 2020

More Hardware and Tabernacle

The tabernacle has probably been taking me more time than is should, but I guess it hasn't been up to par for me. I want to have my tabernacle to be removable, so I needed to add more bolts. I decided on 6 bolts to secure it, so I first started out with the drill/fill/drill method.

Below shows the holes already drilled and then filled with thickened epoxy.


Drill/Fill curing with thickened epoxy. 

After the epoxy cured, I drilled the holes and was ready to line up the tabernacle to drill the holes into the cabin. I taped off the cabin wall, as to not damage the paint and measured a few times to make sure things were centered. I inserted the bowsprit also to make sure it fit in the correct position. Once I was satisfied, I drilled the first hole and then inserted a bolt and tightened it so that the piece would not move. I then drilled the remained 5 holes.

I have since coated the holes with epoxy to protect them and will do multiple coats. I also counter sunk the top 4 holes so that they will not interfere with the mast. The other 2 holes are below the bowsprit, so they don't need to have it done.


I think I am going to paint the tabernacle. Originally I was going to leave it natural, but I have had to touch it up too much for it to look good.

Companion Way Drop Boards
To hold the top drop board from falling down, there is a piece of wood that is attached to the bottom.
I took a piece that I had and first thought I would just use a router and bevel the edge. The result didn't take enough wood off, so I took to the good old hand plane. This made quick work and took off the necessary wood quickly.


Drop Board wooden cleat after hand planing the edges.

I coated the piece today and will have to apply another coat before varnish


Motor Mount
I decided to go with a Torqeedo Battery Motor to start. It is a long shaft 3 hp equivalent. I bought an adjustable motor mount from West Marine. Today I spent a long time determining where I would mount it. I decided on the port side, since I am right handed and will probably sit there a lot especially when using the motor. My son was over today, so he helped me hold it in place and test various positions. I installed the rudder and tiller and tied if on so it was pulled all the way over to the port side.  I then drilled the holes and coated them with the first coat of epoxy. 

I need to get some better hardware to mount it will probably get a backing plate. 

Dry run of the motor mount with motor. 

I am coming along with everything. The hardware installs are taking a lot longer than you would expect and I want the finishing touches to look good. I also will probably be ordering my Trailex Trailer from CLCBoats in a week or so! She will definitely be in the water this year!!! 


Monday, December 30, 2019

Portholes and other Hardware


Portholes
I have been delaying ordering some portholes, but I decided to give my self an early Christmas gift.
I looked around a lot to find something I would like and finally decided on the Vetus 52q which fits perfectly in a 6" hole.  I was able to get at a discount due to a black Friday sale.

The portholes come with screens that can be inserted, so I should be able to get some good ventilation. After marking the holes and drilling them out, I did a couple coats of epoxy using a pipe cleaner and then used 3m Sealant on all the holes and thoroughly coated the inside and outside to properly seal things.

I am very pleased with how they look!


Assorted Hardware

Harken #327 cam cleat for Jib sheets
I pre-drilled the holes and coated with epoxy. After curing I installed with bolts and 3M Sealant.


Chain Plates

I predrilled the holes after measuring location per the plans. Coated the holes with epoxy and then used bolts to install. 


Both the Chainplate and Jib Leads installed.


Below are pictures of the anchor cleats on both the port and starboard side. They are bolted through for strength.  Again I pre-drilled, coated the holes with epoxy and then used 3m Sealant when installing. 


Rudder Install 

I have sort of been putting this installation off, since it required me to drill into the boat. I know everything is repairable, but after spending so much time on making things look good it is tough for me.  So I finally decided to take the plunge.

I first drilled the hole in the keel, but first I sized up the bolts that came with the kit and did some test holes in a scrap piece to make sure I had the right size. After drilling the holes, I mixed up some sort of thickened epoxy. I didn't want it too thick since I had to use a syringe to squirt epoxy up into the hole and also on the eye bolts. I threaded the bolt into the hole applying epoxy as I went. I used this same method on the 2 eye bolt holes on the rudder. The upper bolt on the boat, I had to cut off to length and just used 3M Sealant to seal things up.

The bar shown in the picture below had to be cut off to length and two holes in each end to hold the key rings so the bar will not come out. Not sure that is the proper term, but thats what it looks like to me. I also may install a second one on each end for safety. Wouldn't want one breaking and coming off. That would not be a nice scene!!!


Below is a test fit of the rudder.  I inserted the tiller and looks like i have plenty of movement. I still need to finish up the painting once it gets warmer.


Sunday, December 8, 2019

More Hardware Installs!

Continuing to slowly get tasks done.

Below are some pictures of some of the wooden pieces drying after 2 coats of epoxy.


I decided to cut a clothes hanger and use it to hang the small pieces. Worked pretty good.


If you don't recall, I added a 1/4 inch thick piece of plywood to the tabernacle to help with strengthening it. I finished up re-drilling the holes and put some fiberglass over one side. Below is a picture of one of the sides curing. I still need to do the other side. The temperatures in the garage have been in the mid 50's so I have been using work lights to help things cure.  Not an ideal time to do epoxy work.


After drilling some of the holes for the hardware and applying some epoxy to each on a couple different times, I installed the bolts for some of the hardware. I used 3m sealant applied to the bolts and bottom of the hardware. It is funny it actually took a lot of time to install 10 pieces. 


I found that the portholes that I have yet to install allowed me to reach in the opening to install the nuts and washers and tighten them up.  

We have been taking a lot of weekend trips lately, so work time has been limited. I am taking some time off for Christmas and should have more time to do more work. 


Monday, November 4, 2019

Continued Hardware Installs

I finished up installing the port side Lazarette hatch and other Cowl vent. I had to wait to install together, because of the 3M Silicone Sealant drying up quickly. On the label, it mentions you must use within 24 hours once the seal is broken, so I didn't want to waste any. I didn't take any pictures, but the starboard side looks the same.

The small pieces below are wooden washers or what I am calling them. They will go on the inside of the boat to what I guess is protect the hull from being damaged when I tighten up the nuts and washers. I cut out some extra and will need to coat them with epoxy.

The longer pieces are to hold the companion way drop boards in place. I need to coat them with epoxy and then will most likely varnish.


I spent a while locating the halyard cleats ( 2 on both sides of the companion way hood) and the blocks by the cowl vents. I find it difficult to drill holes in the boat after spending all the time to make things look nice.  I will need to put some epoxy in the holes before installing the stainless steel fasteners.

Halyard cleat holes, 2 per side. 

Holes drilled for the 2 blocks. 2 on the other side drilled as well. 
I did have to spend some time with the fasteners. I took a trip to the local hardware store and took some of the cleats and blocks with me. I tried to estimate the size and some of the them had the instructions on installing online, but some didn't. So I thought the safest thing was to take them with me and try out. The ACE Hardware has fasteners by the piece vs. the big box stores having packages of them. I could just pick one up and try it. I only purchased a portion, but the store is just up the road 10 minutes away.