 |
 |
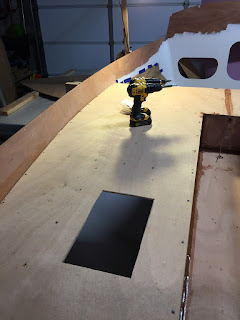
| Both decking boards installed and I think screws removed. |
Below is the decking with the temporary screw holes filled with thickened epoxy with wood floor. In the above I usually use thickened epoxy with cabosil for wood to wood joints. I will be sanding them smooth this weekend.
In bulkhead #1 there is a drain opening that you need to install a drain plug. I wanted something that looked nice, so I purchased this Perko drain plug. No sure why some of the hardware pieces do not come with the hardware kit from CLC. I got this at Jamestown Distribution.
 |
| Close up of the drain plug. I used 3M 5200 to install as well as 1/2 inch bronze screws. |
 |
| Here is a picture of it installed. The tape on the plug was so they 3M 5200 wouldn't get on the threads. |
For the inspection hole, I installed a SeaDog plastic inspection port that I got from CLCBoats.
They fit perfectly and they are the exact depth of the wood. I took some pictures of the parts in case someone wants to order the same thing.
The next set of pictures are the floatation in the bow section. You are supposed to create a tunnel for installing the bow-eye later on. I cut out using a pattern for the 2 larger pieces, but had a problem trying to keep them in place. I thought about using a hot glue gun, but then thought about the trusty ole cable tie. You can see a piece held together below on the top. Right below the inspection port, there is another piece, so I have both the top and bottom forced apart. I was then able to cut smaller pieces and wedge them in firmly.
This is a good view of the tunnel I created. I will fill this in later with smaller pieces put through the inspection port.
Below is the smaller pieces wedged in on both sides. I measured the widest part and then cut by eye until I got it to wedge in firmly. I put a couple extra pieces on top, so they should not move much or if any.
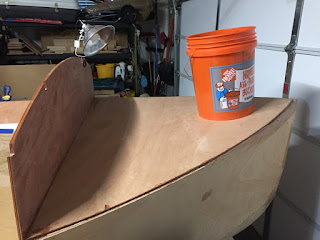
Below is the decking over the bow section. It is all closed up now! The bucket is filled with clamps. I used it as weight to hold down the bow decking until I could put some temporary screws in. I have removed them and need to fill and then sand smooth. The piece fit pretty good. I did have to use a plane to allow a edge for the upper piece that I will be installing this weekend. You can see the edge below if you look closely. I was sure to clean up any thickened epoxy.
Another picture of the decking in place. I will have to climb inside this weekend and put some fillets along the sides. Not looking forward to that!
Below are the cabin wall and bow decking that I put 3 coats of epoxy on the inside / underside before installing them.
Things are moving along pretty good. I hope to get a lot more done this coming up weekend.


No comments:
Post a Comment